SHOE FITTING &
CLEAT SETTING
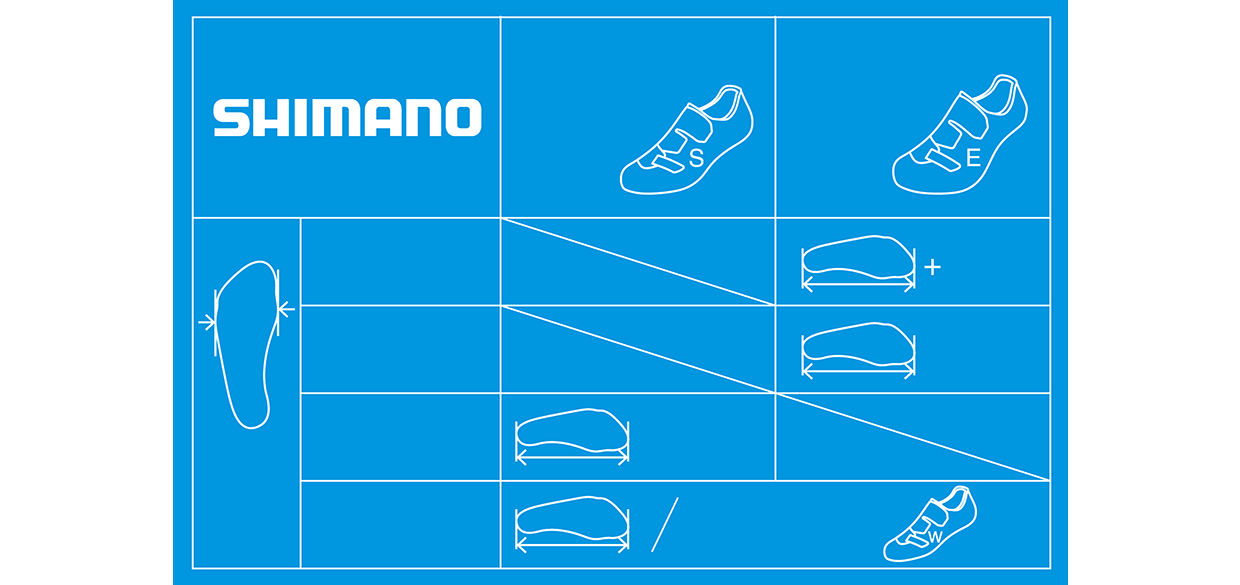
The optimal shoe size is found by measuring the arch length, foot length and width.
This sizing information can then be cross-checked with the shoe size table, to find the shoe size and width that best matches the rider.
Prepare the device
Prepare the device by setting the width bar to its widest position and the arch length pointer slid all the way back.
This will allow the foot to be positioned easily into the device.
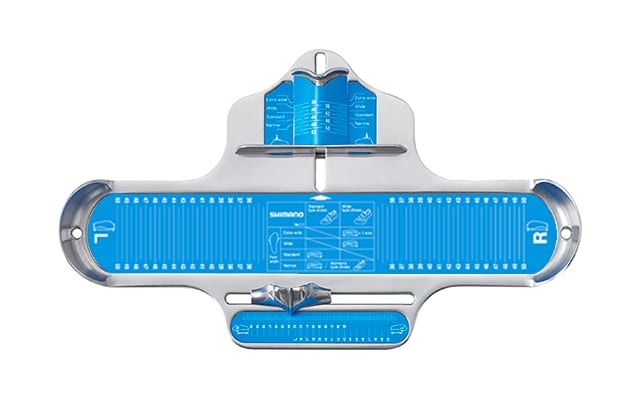
- WIDTH BAR
- HEEL CUP (L)
- HEEL CUP (R)
- ARCH LENGTH
POINTER
WIDTH BAR
HEEL CUP (L)
ARCH LENGTH POINTER
HEEL CUP (R)
Measurement
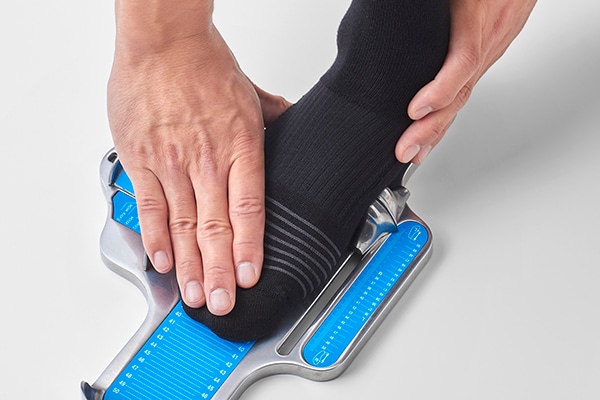
1 PREPARE FOR MEASUREMENT
Remove footwear. Place right or left heel into matching heel cup. Stand with equal weight on both feet. Check to make sure heel is all the way back into the cup.
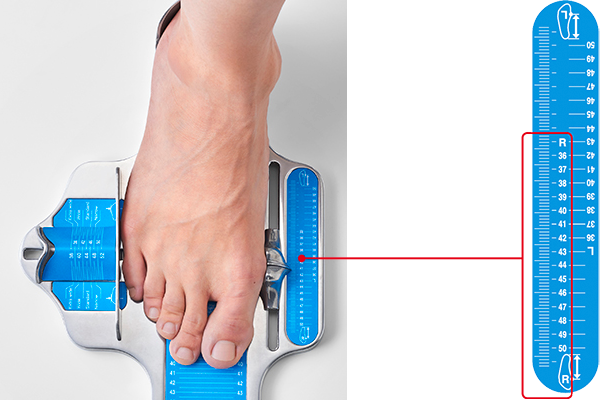
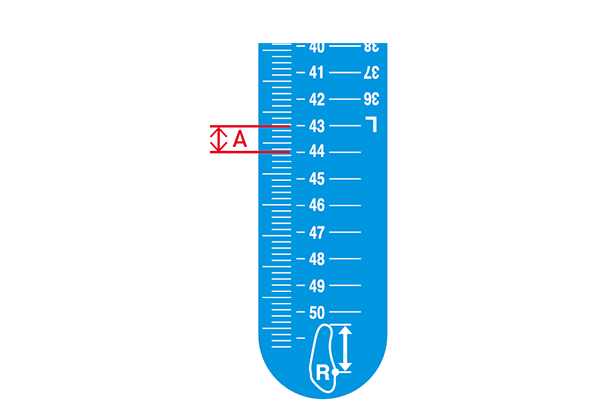
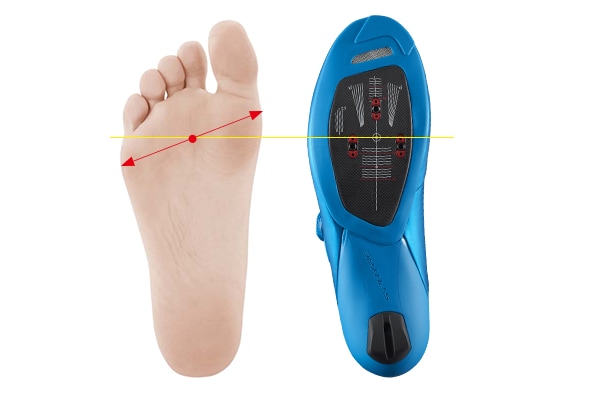
2 MEASURE THE ARCH LENGTH
Find the ball joint of the foot. Slide the pointer and align it with ball joint. Read the arch length position aligned with the pointer.
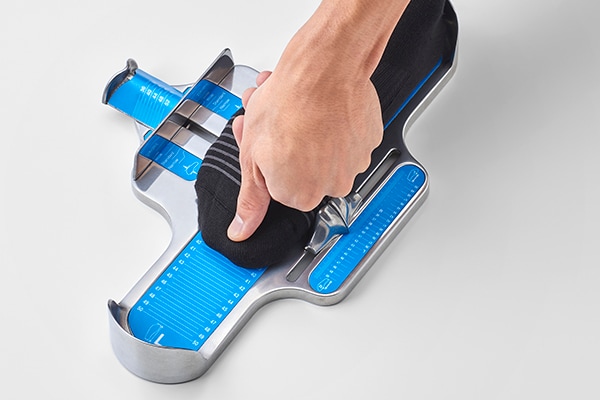
3 MEASURE THE FOOT LENGTH
Press the toes flat against the base of the device. Take the foot length measurement from the end of the longest toe.
*Note: The longest toe may not be the “Big” toe for some customers.
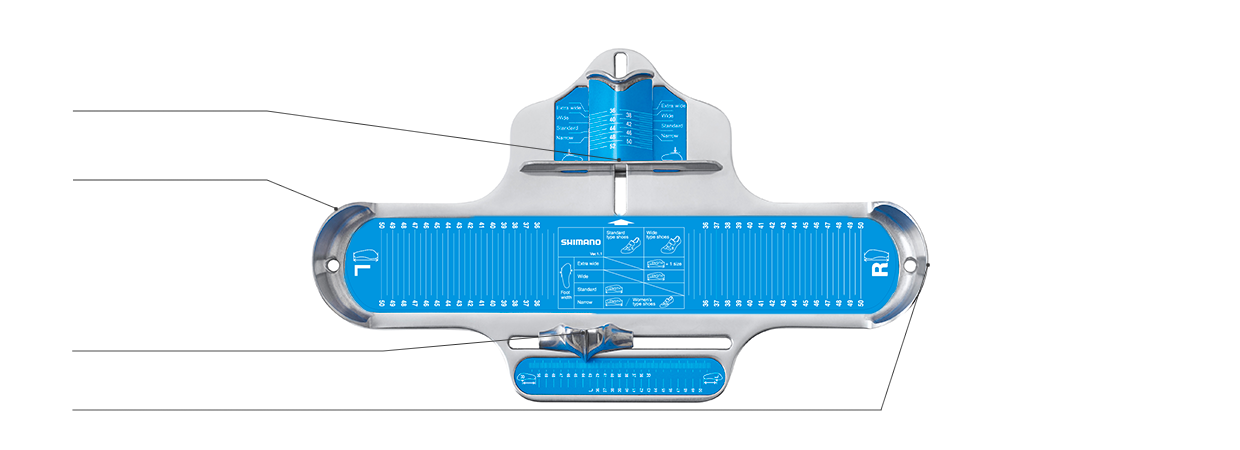
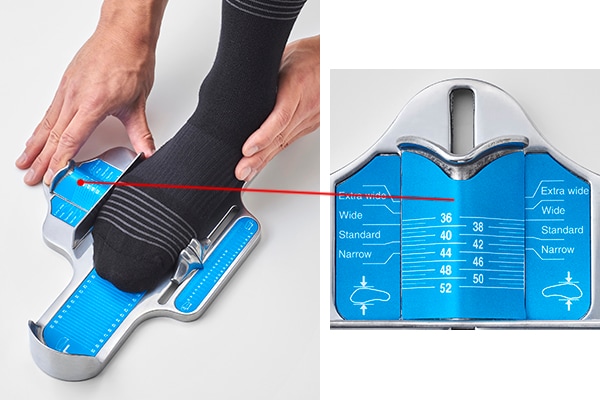
4 MEASURE THE FOOT WIDTH
Slide the width bar to the edge of the foot. Read the foot width that corresponds to the measured foot length.
*For example, if the length measurement was 43, this photo shows the corresponding width is “Wide”.
Find the correct shoes
With this information, choose the right shoe size from the table on the center of the device.

- Ver.1.1
- Standard
type shoes - Wide
type shoes - Foot
width - Extra wide
- Wide
- Standard
- Narrow
- LENGTH
- LENGTH
- Women’s
type shoes - LENGTH
- 1 size
- LENGTH
Ver.1.1
Standard type shoes
Wide type shoes
Foot width
Extra wide
Wide
Standard
Narrow
LENGTH
LENGTH
Women’s type shoes
LENGTH
1 size
LENGTH
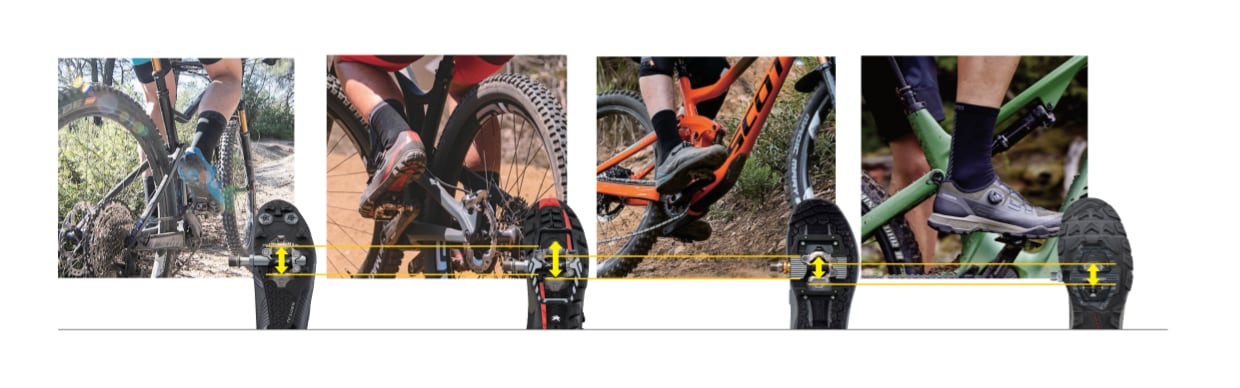
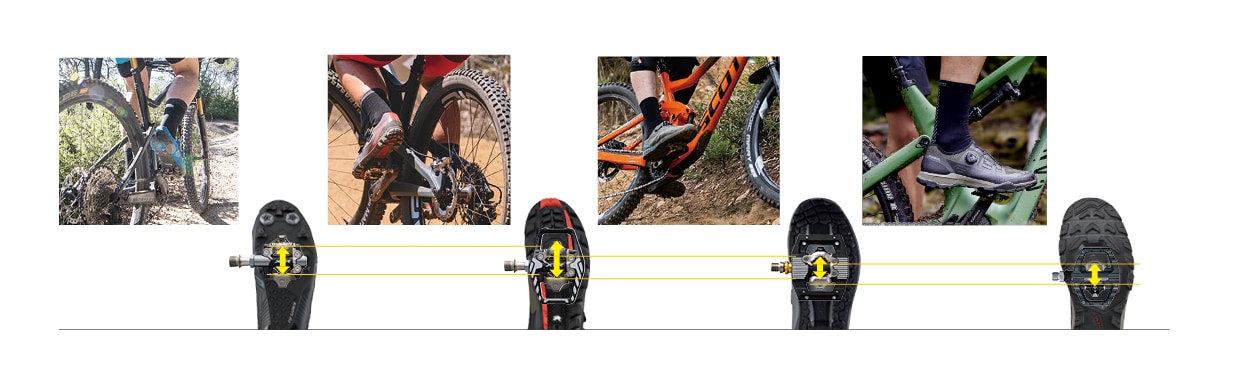
Set initial cleat position using your arch length
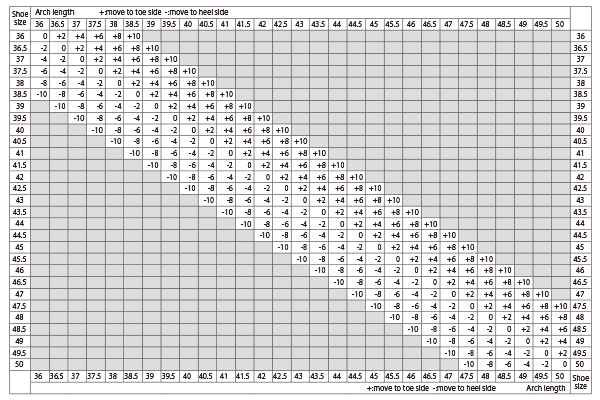
Set the initial cleat position according to the difference between shoe size and measured arch length. If the arch length is longer or shorter than the shoe size, the cleat maybe positioned fore or aft from the center line of the cleat range of the shoe by the difference of the scale.
*For example, if the right shoe size is 43 and the arch length measurement is 44, the cleat should be positioned (distance A) forward, toward the toe end, from the cleat range center line of the shoe sole.
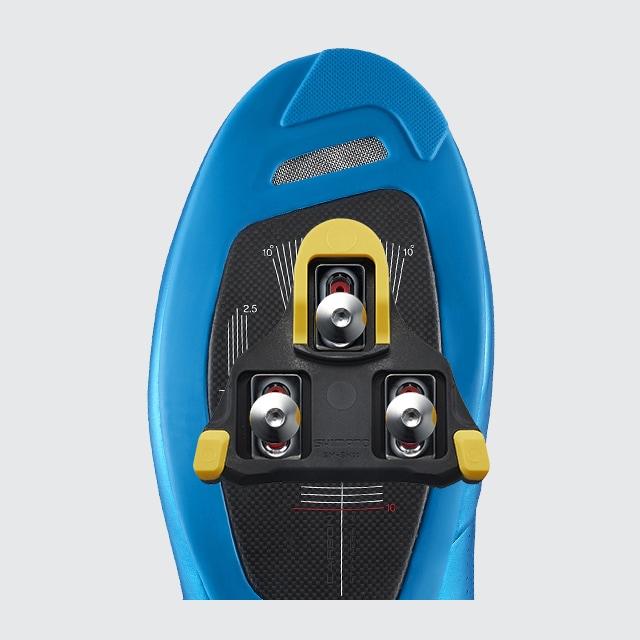
If the measured arch length and shoe size are equal, set the cleat at the standard cleat position (See table below) which is at the center of the ball of the foot.
If the measured arch length is longer than the shoe size, move the cleat forward, toward the toe side, the required length from the center position.
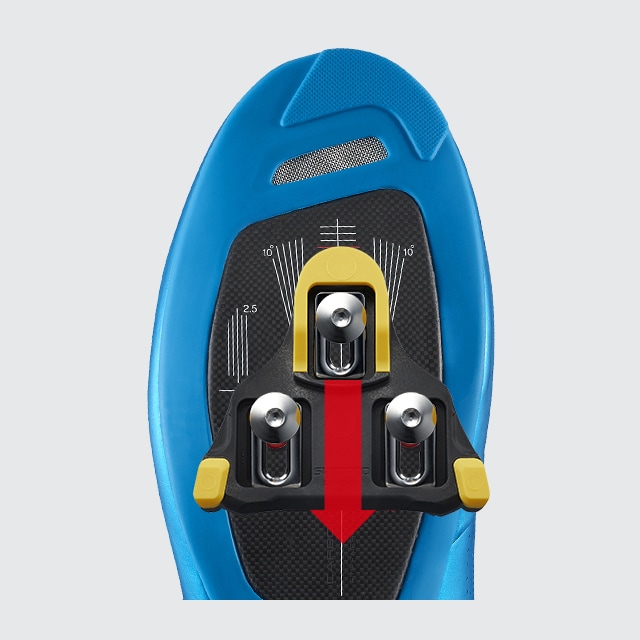
If the measured arch length is shorter than the shoe size, move the cleat back, toward the heel side, the required length from the center position.
Standard Cleat Position is the center of the ball of the foot
Standard cleat position table
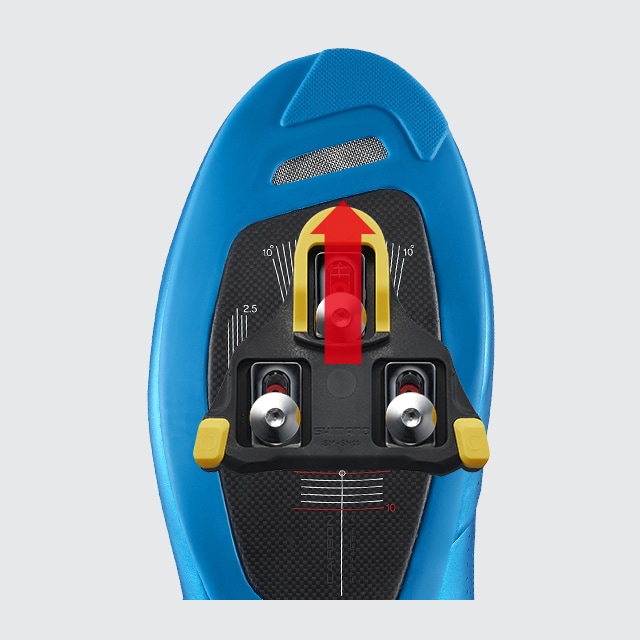
Optimized cleat position and adjustment
The SHIMANO customized Brannock Device® foot measurement chart also makes it possible to attach cleats in the recommended position at the center of the ball of the foot. After setting the cleat in the standard position, you can then fine-tune the cleat position to improve bike control.
CLEAT ADJUSTMENT RANGE Standard ROAD/XC Pedaling Stability Wide Standard + additional rearward ME Pedaling and Bike control
(Rider tune) Rearward AM Bike control Extended midfoot cleat range EX Bike control and walkablity