Setting up a power meter using E-TUBE PROJECT Cyclist
Configuring power measurement accuracy improvement
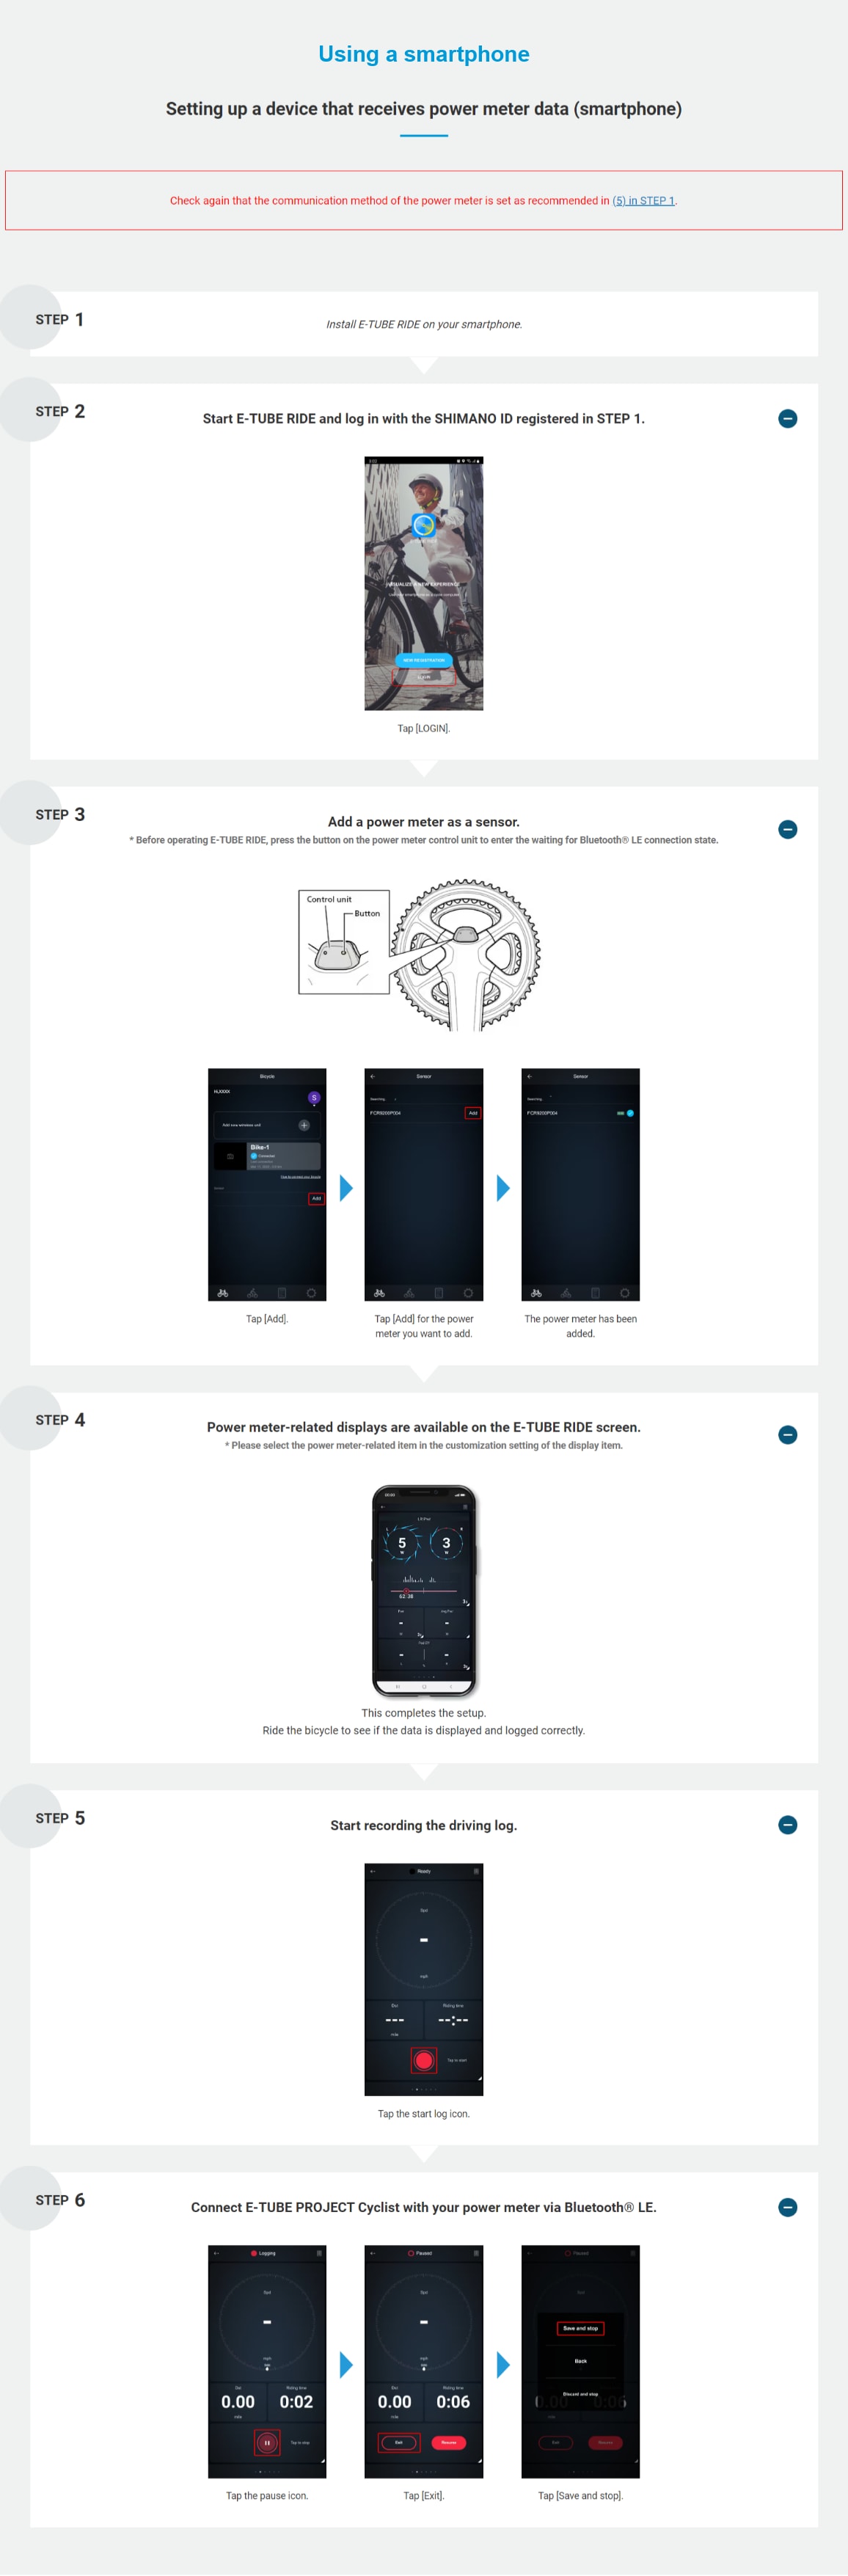
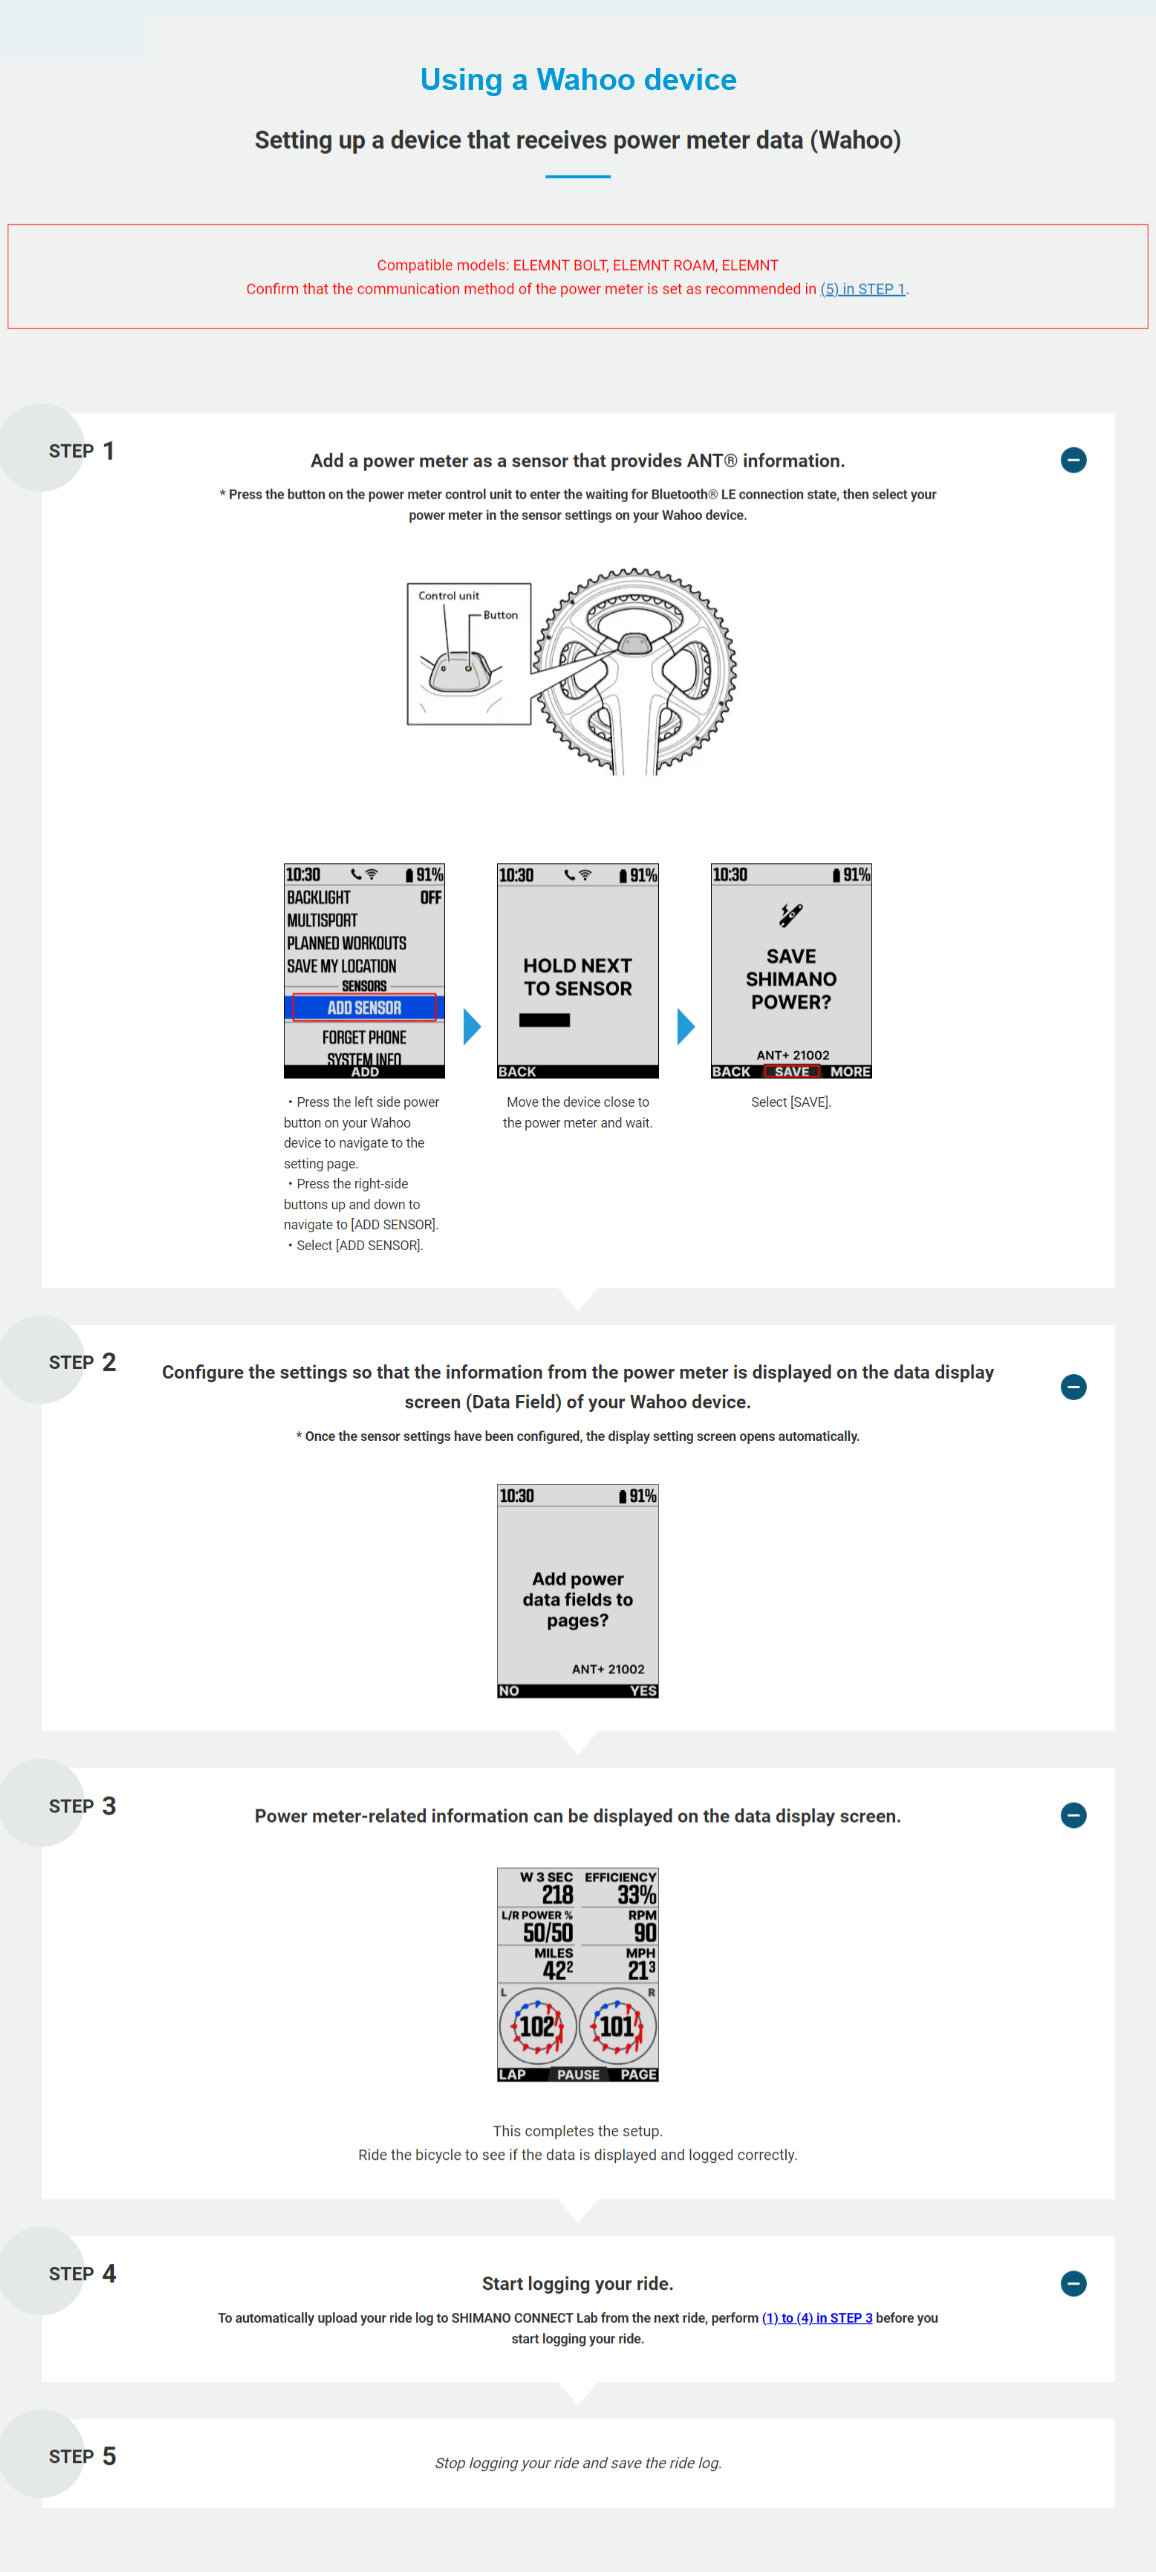
Setting up a device that receives power meter data
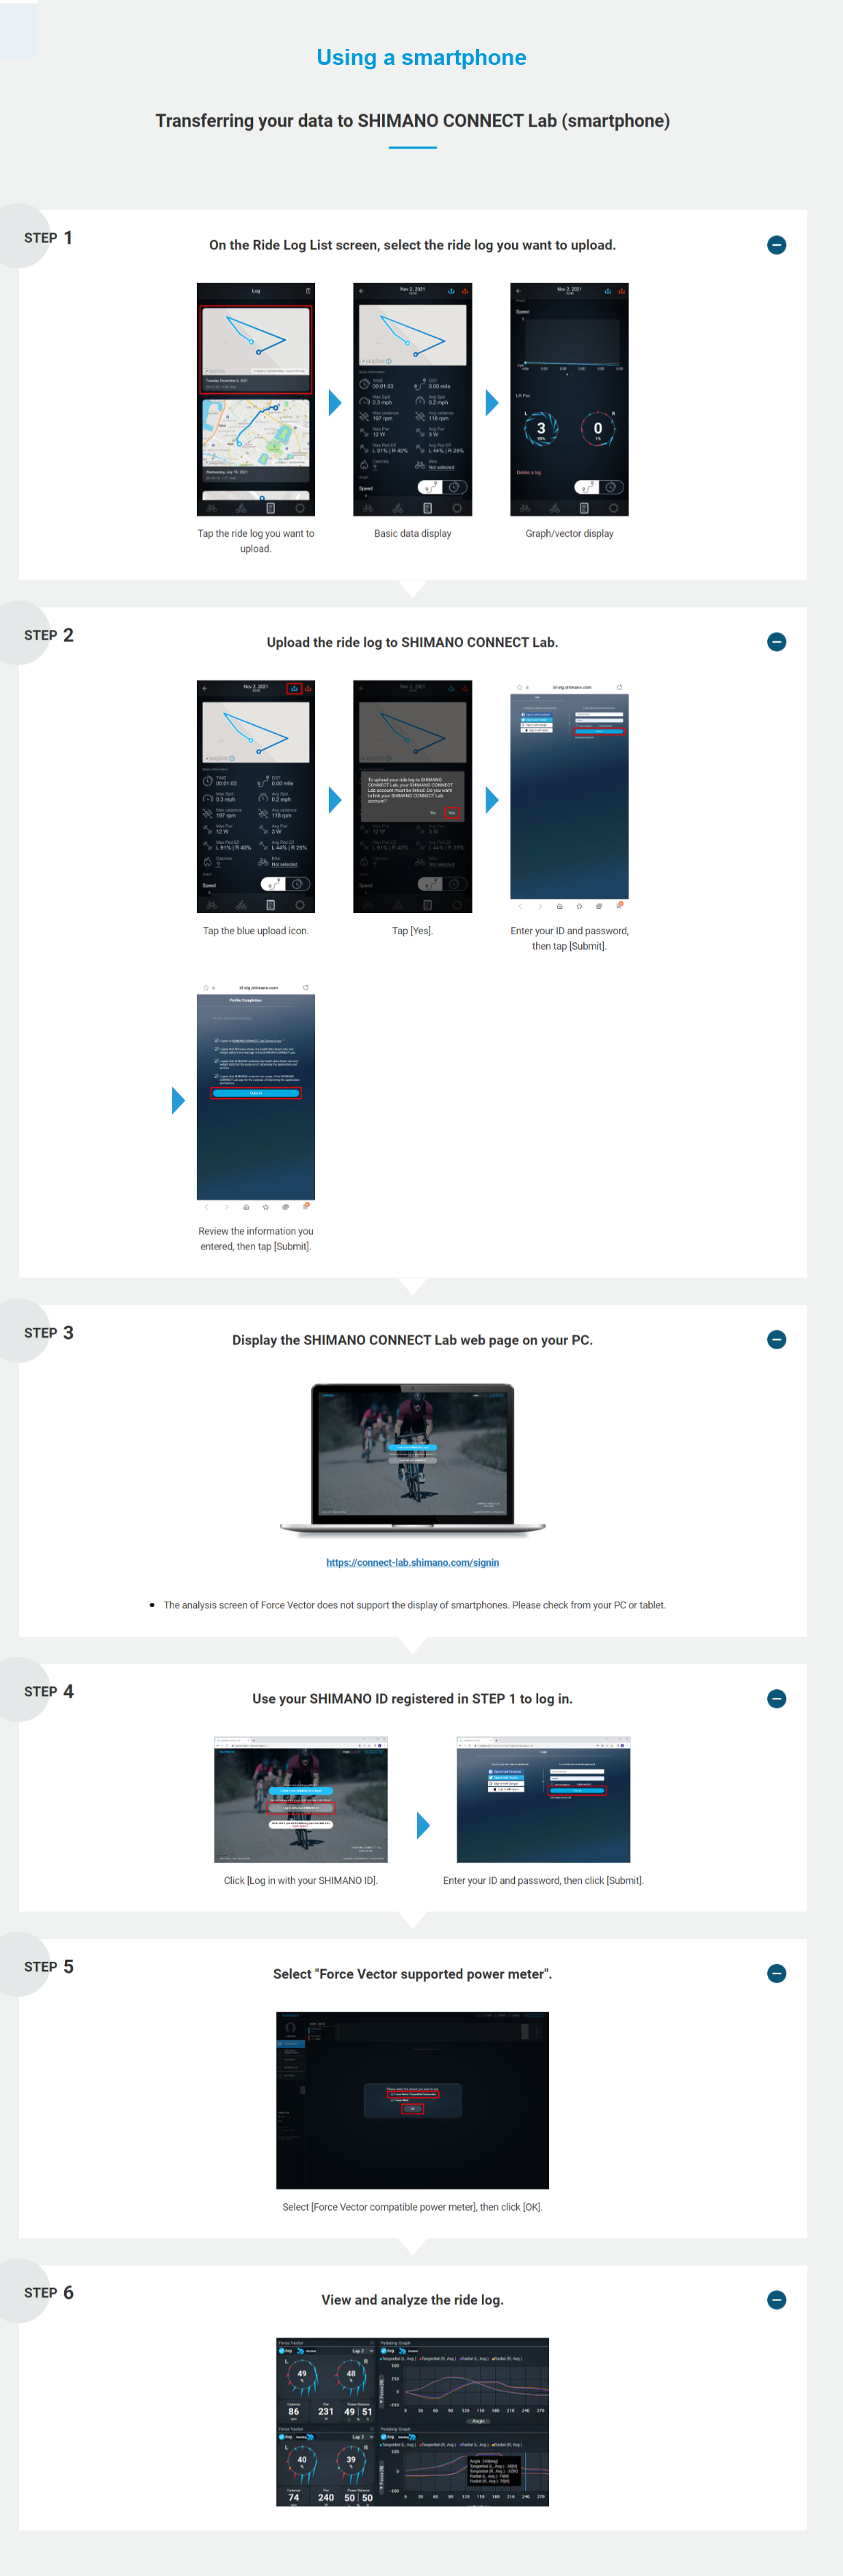
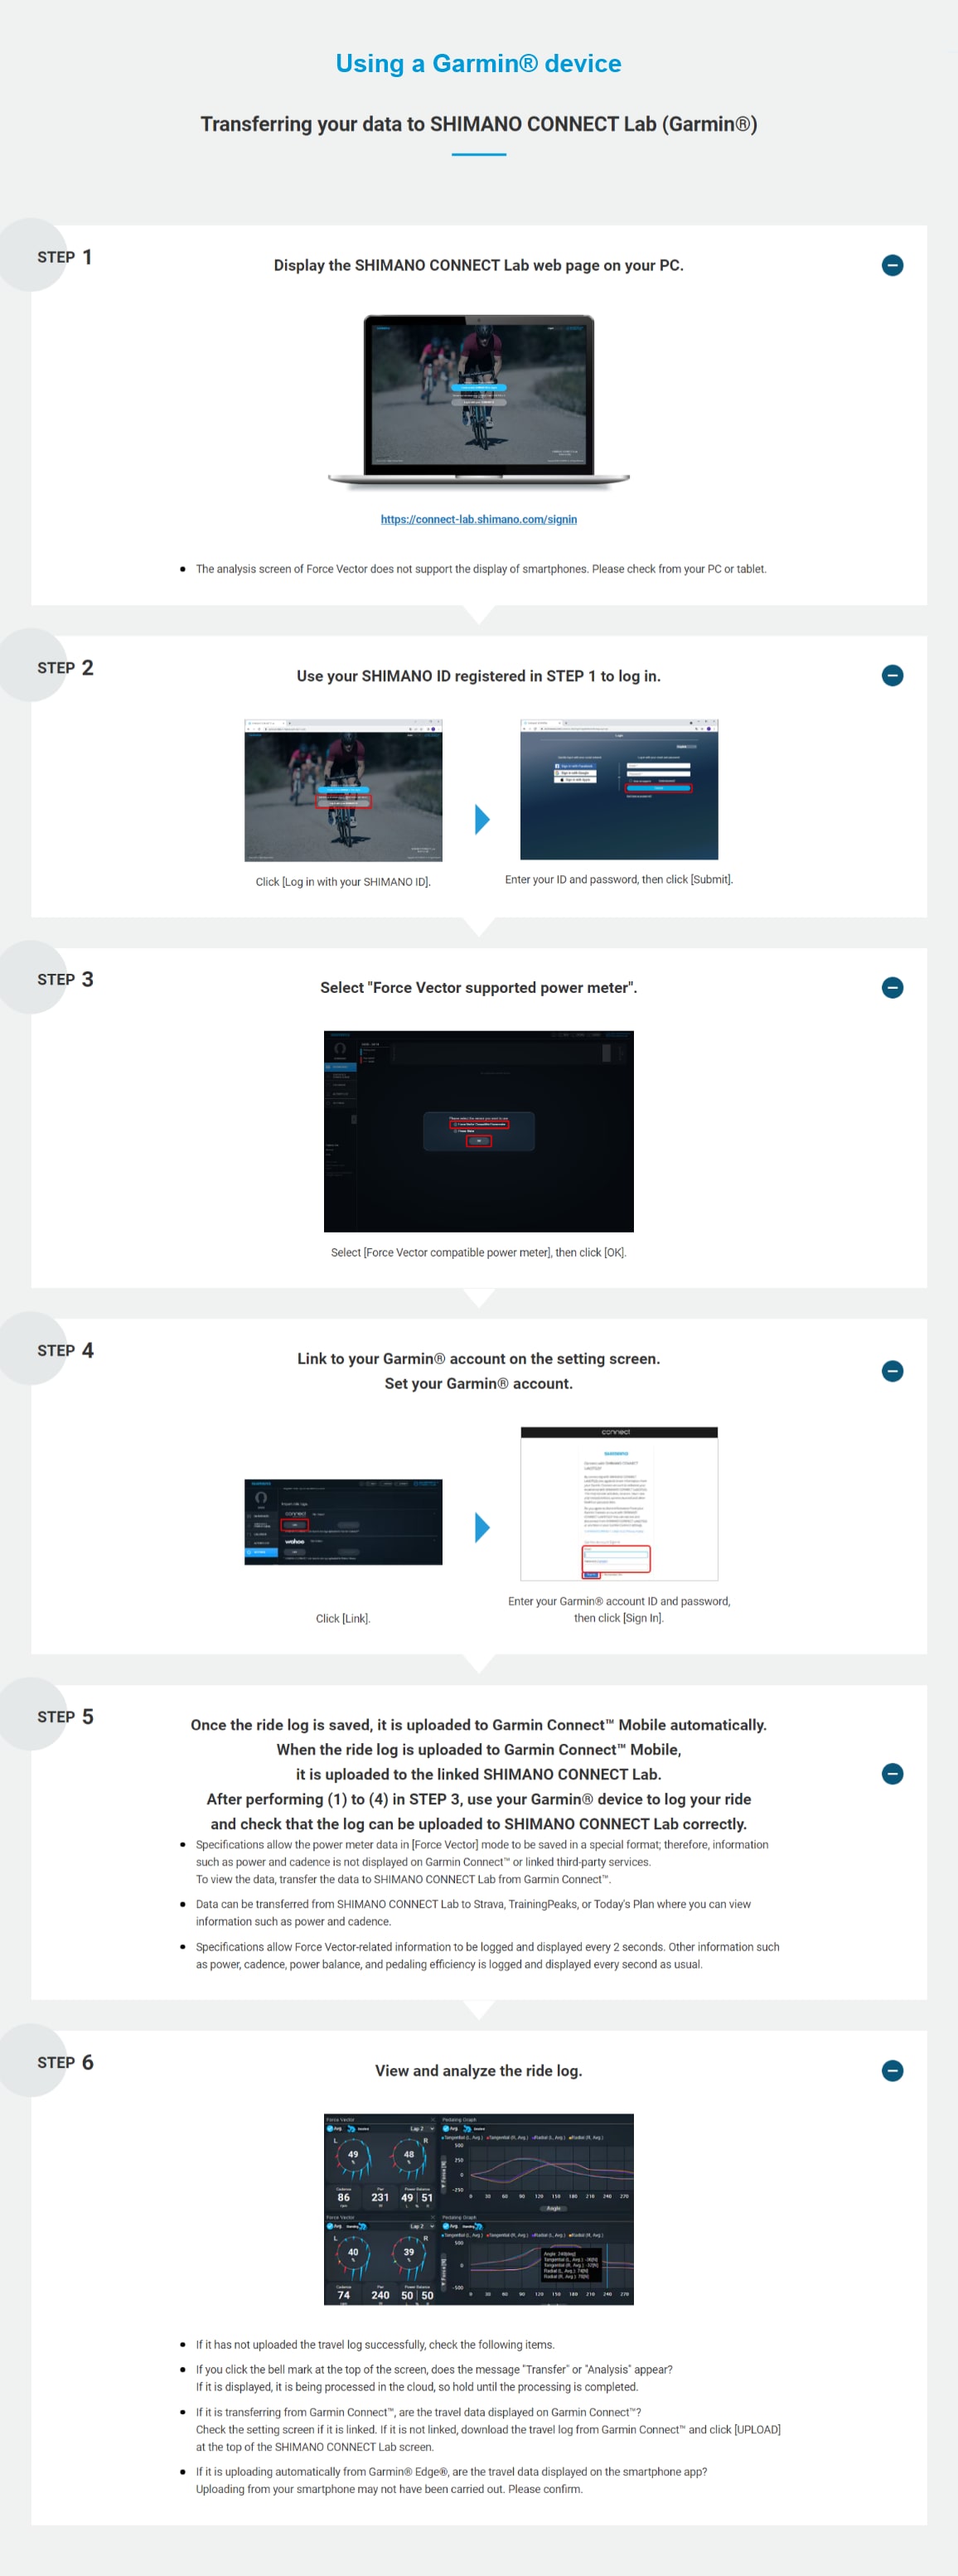
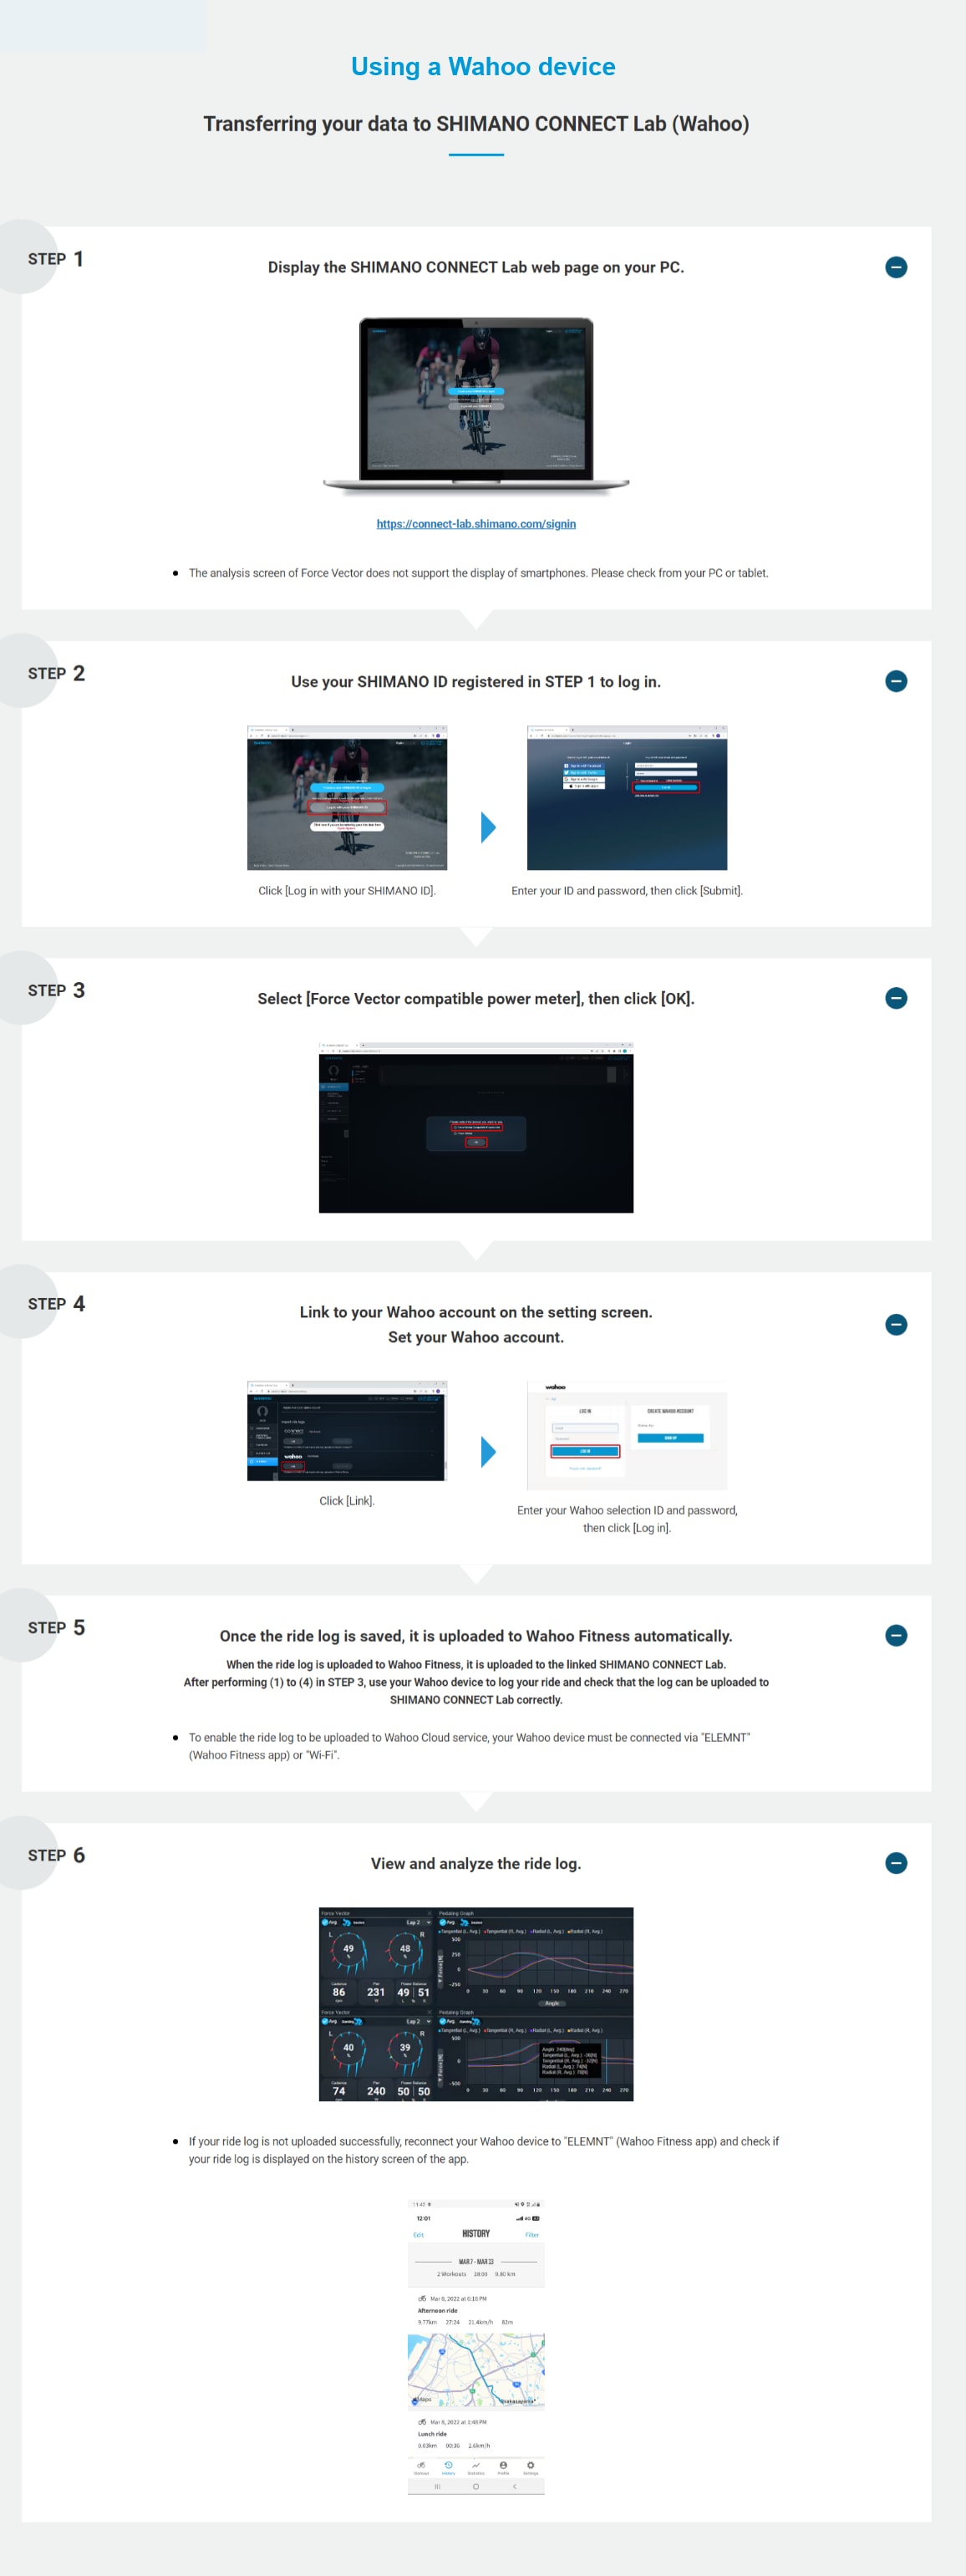
Transferring your data to SHIMANO CONNECT Lab
THIS WEBSITE USES COOKIES TO IMPROVE YOUR USER EXPERIENCE.
Click "I agree" or any link to accept these cookies. To learn more about how we use cookies, read our privacy policy.