


If you can't visit your local SHIMANO dealer or bike shop to get a complete measurement with a Brannock Device, you can determine your shoe size at home in three simple steps.
SELECT LOCATION AND LANGUAGE
GLOBAL
AMERICAS
-
BELGIUM
FRANÇAIS
-
BELGIUM
NEDERLANDS
-
NETHERLANDS
NEDERLANDS
-
SWITZERLAND
DEUTSCH
-
SWITZERLAND
FRANÇAIS
-
SWITZERLAND
ITALIANO
-
AUSTRIA
DEUTSCH
-
FRANCE
FRANÇAIS
-
GERMANY
DEUTSCH
-
ITALY
ITALIANO
-
SPAIN
ESPAÑOL
-
PORTUGAL
PORTUGUÊS
-
POLAND
POLSKI
-
UNITED KINGDOM
ENGLISH
-
SWEDEN
SVENSKA
-
DENMARK
DANSK
-
NORWAY
NORSK
-
FINLAND
SUOMI
EUROPE
ASIA
OCEANIA
FIND YOUR FIT AT HOME
FIND YOUR FIT AT HOME
STEP1
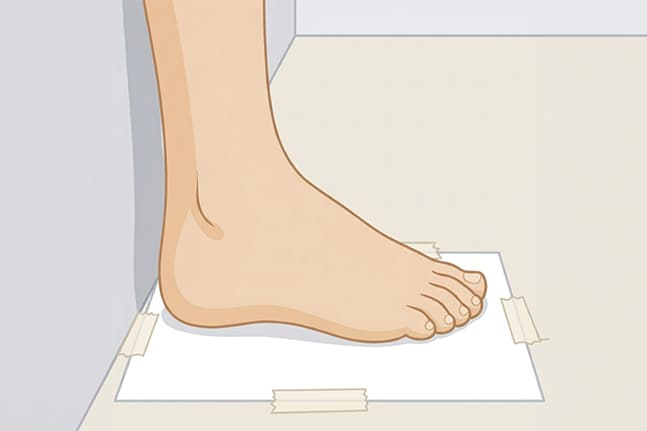
Prepare
・Paper (larger than your foot)
・Pen or pencil
・Ruler (metric is preferred)
Tips:
・Wear the same socks you usually ride in
・Secure the paper with masking tape to prevent it from slipping.
STEP2
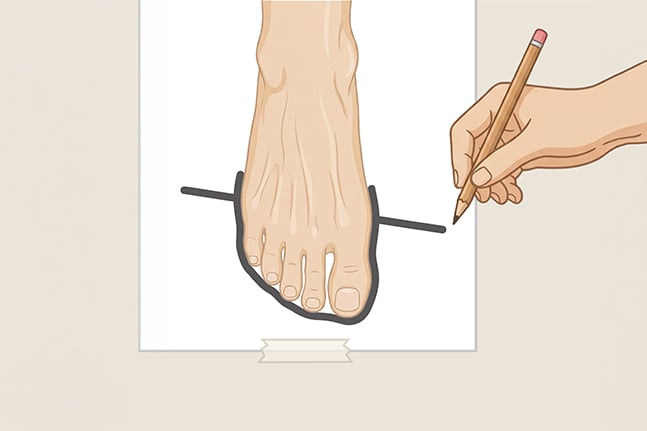
Trace
Place the sheet of paper on a hard, flat floor against a wall.
Stand with your heel lightly touching the wall.
Trace around your foot with a pen held vertically or mark the tip of your longest toe.
Continue tracing all the way to the widest points at the base of the big toe and little toe.
Mark the widest points on both sides of the foot.
STEP3
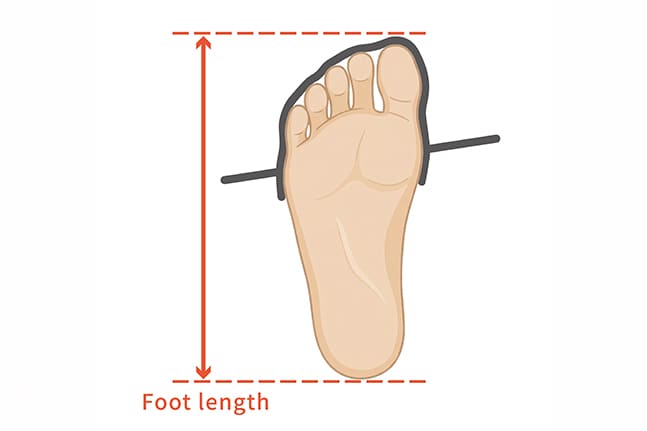
Measure length
Measure from the edge of the paper to the longest toe using a ruler.
Record the number.
Repeat for the other foot and use the longer measurement.
Note: Use the longer foot to determine the length.
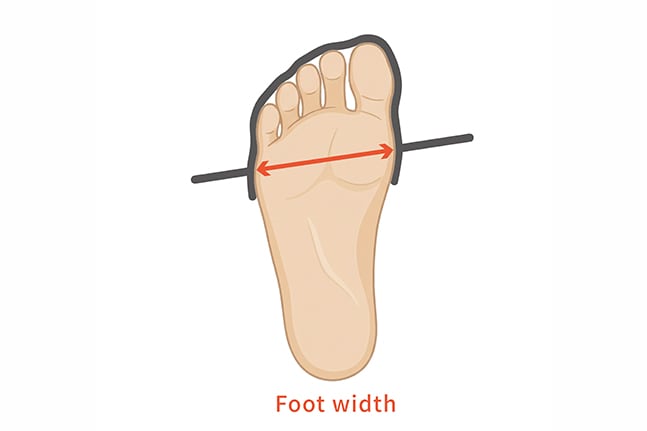
Measure width
Draw a line through the marks on either side of the foot.
Note: This line may be slightly angled.
Measure this line at the widest point, as shown by the red line in the image.
Repeat for the other foot and use the average of the two measurements.
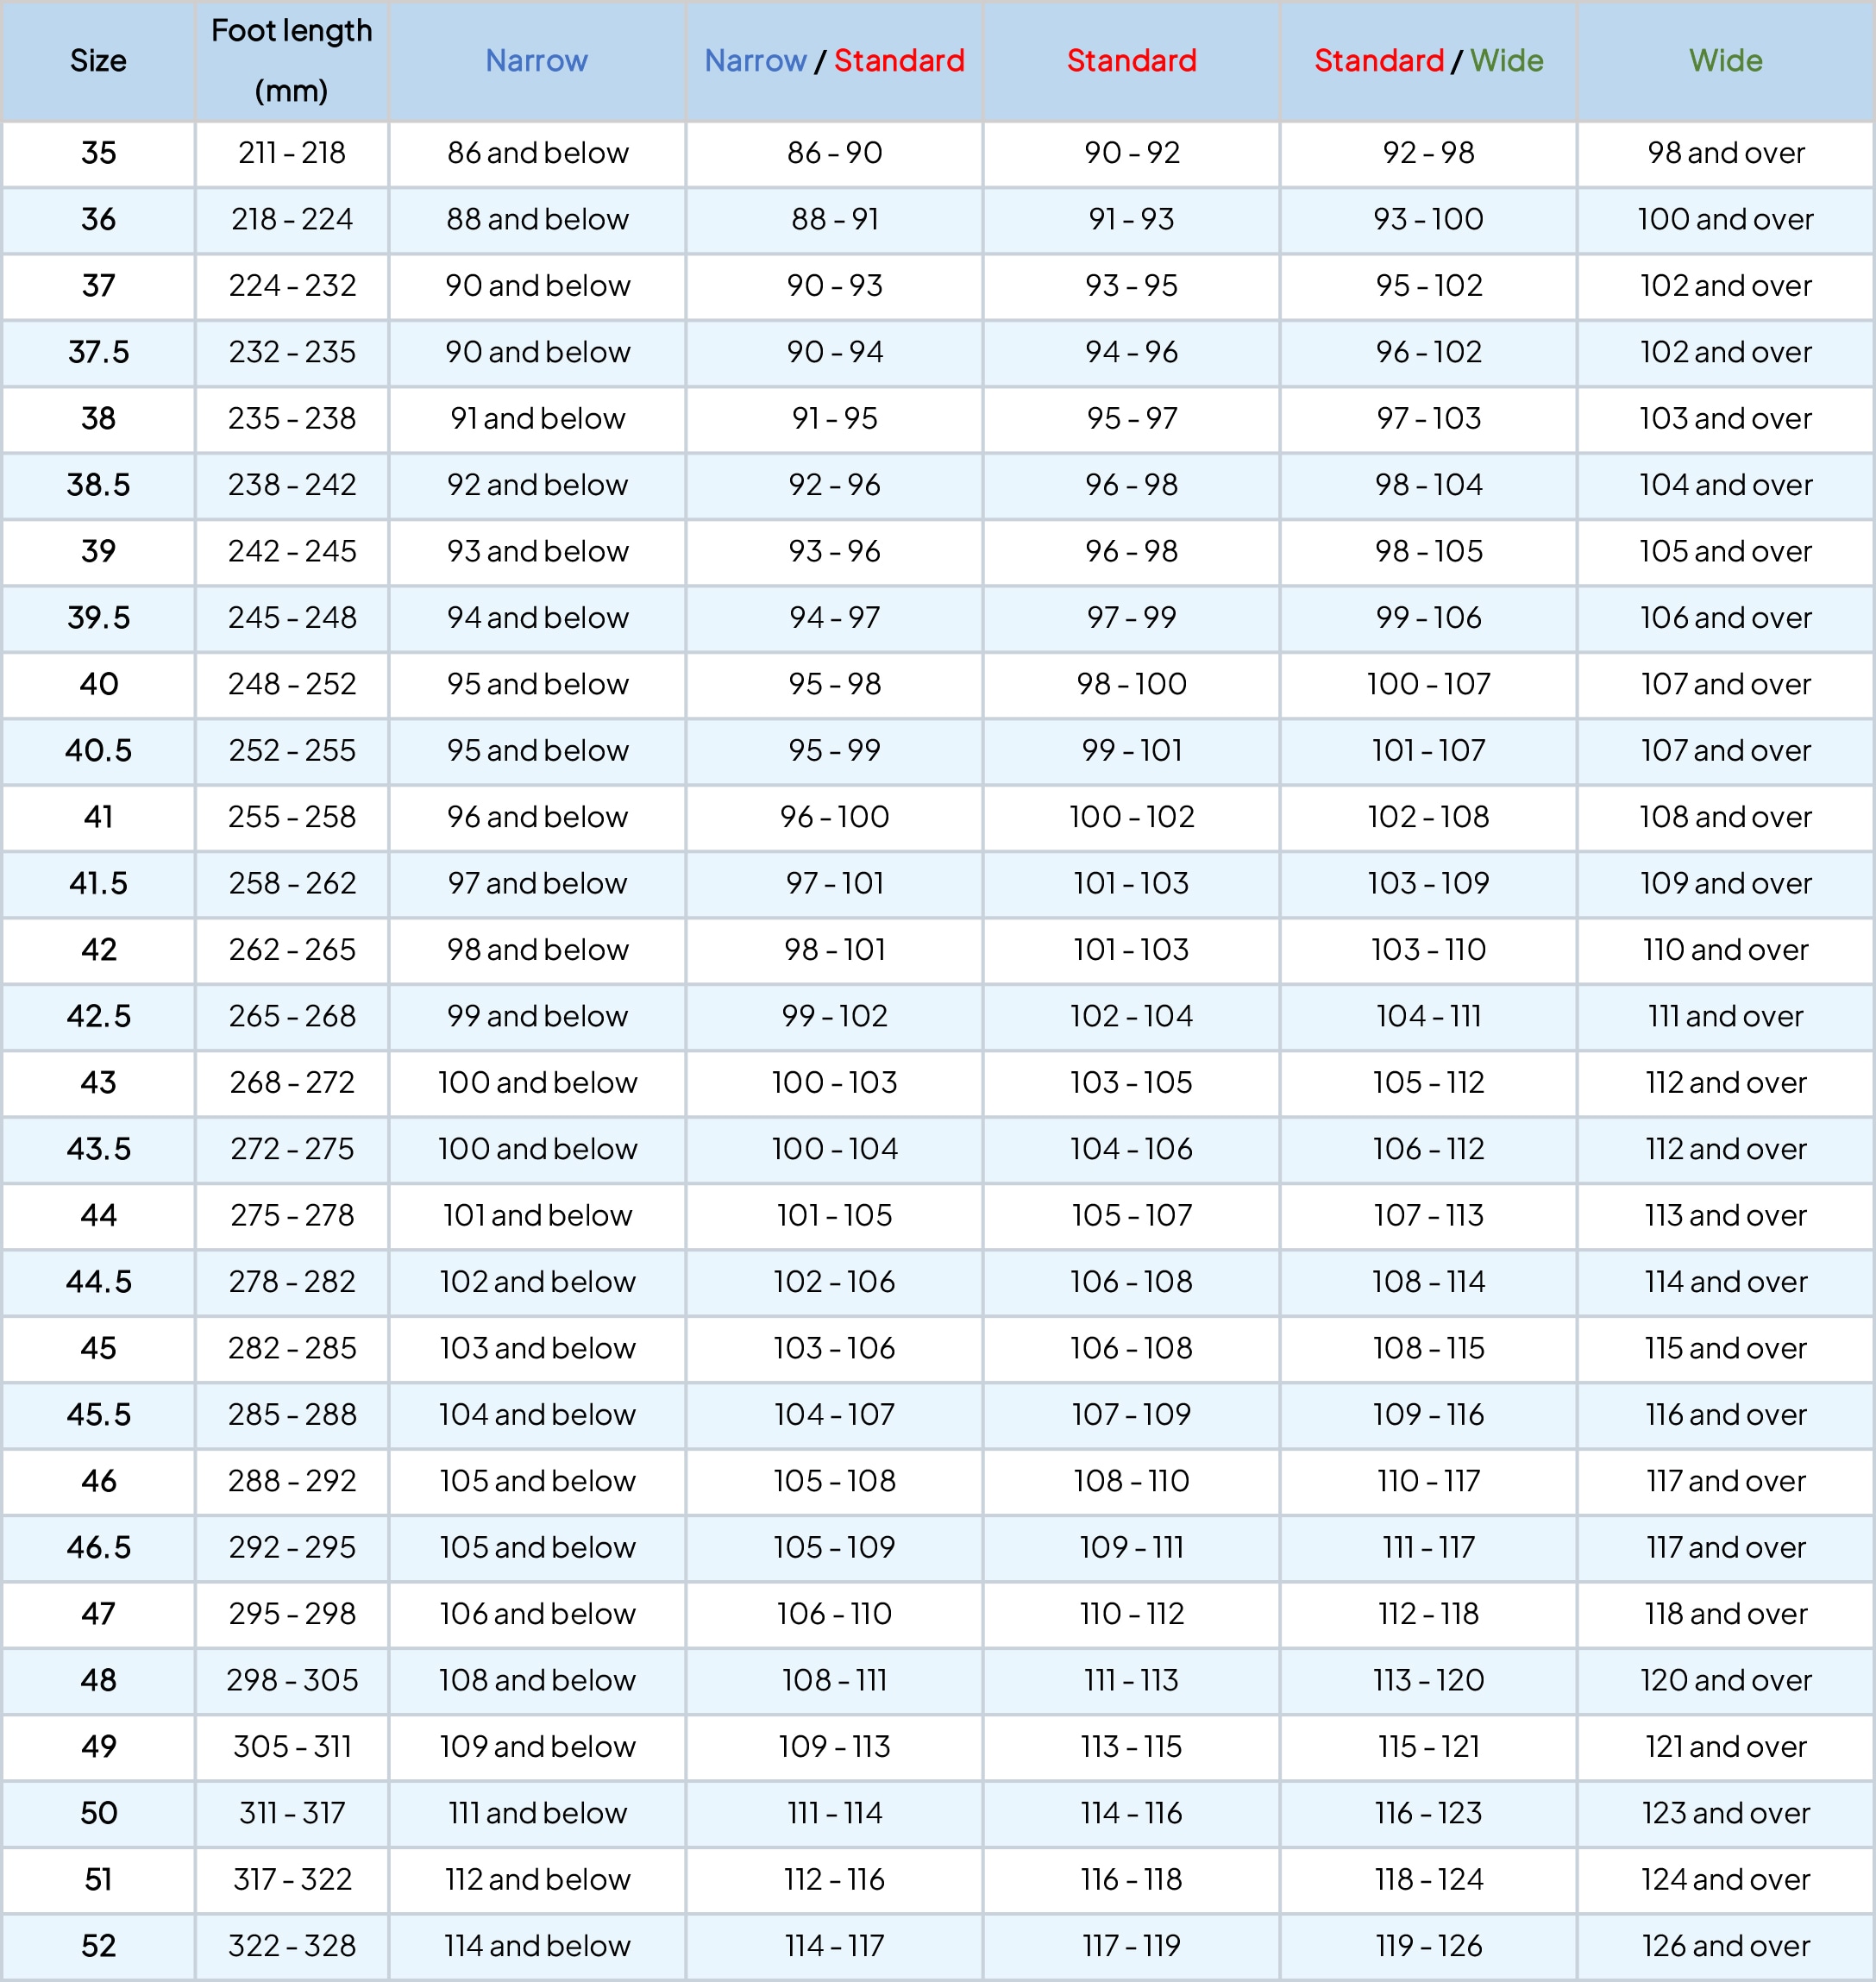
Now, you can use your measurements to find your size on the chart.
Here is an example using foot measurements.
Length
Left foot length: 266 mm, right foot length: 265 mm
Use the longer of the two measurements: 266 mm
The length of 266 mm falls within the size 42.5 row (265-268).
Width
Left foot width: 108 mm, right foot width: 104 mm
Average of the foot widths: 106 mm
The foot width of 106 mm falls in the [Standard / Wide] column.
Notes:
・If you're between sizes, choose the larger size.
・Accurately measuring your feet alone can be difficult. Having someone else mark the points helps ensure correct posture and accurate results.
・1 in 5 people have a large difference between the sizes of their left and right feet. Always choose the size that fits the longer foot and the width that fits the wider foot.
Try-on checklist: Check in order, from top to bottom
・Tap your heel to ensure it is seated in the heel cup
・Ball of the foot sits at the widest part of the shoe
・Base of the little toe is not rubbing
・Instep is not compressed
・At the toe 5-10 mm of room
If you experience…
Toes touching the end: Try going up 1/2 size
Little toe rubbing: Try one width wider: Narrow → Standard → Wide
Foot sliding too much side-to-side: Try one width narrower: Wide → Standard → Narrow
Instep feeling too tight or too loose: Try adjusting the fit with an arch pad
Heel lifting: Try going down 1/2 size or adding an insole

- Slide 1



